

With Final Fantasy XIV’s latest patch comes a new level 70 dungeon, The Drowned City of Skalla. Found beneath the waters of Loch Seld (and unlocked through main story quest progression), Skalla takes place in the ruins of an old city that was swallowed by a flood, as players search for a secret stash of treasure to aid the Ala Mhigan resistance.
The Drowned City of Skalla is grouped with the other “Expert” 4-player dungeons—Ala Mhigo, Temple of the Fist, and Kugane Castle—so you can expect a similar level of difficulty in terms of boss mechanics. That said, it’s got a higher item level requirement (300, rather than 280), so enemies hit harder and live longer than those of the other Expert dungeons relative to current general gear levels.
Quick guide
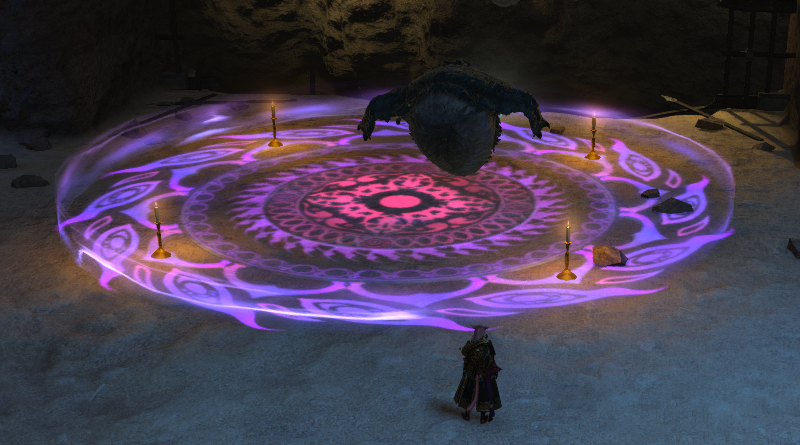
Kelpie
- Stay out of the purple murk
- Put puddles in corners when marked
- Stack on Kelpie for Hydro Pull
- Opposite side from Kelpie for Hydro Push
The Old One
- Stay close to boss to dodge AOEs
- Burn adds
- Be a spriggan
Hrodric Poisontongue
- Move in front when he readies his tail (text emote)
- Move behind when he readies his claws (text emote)
- Move to the side when he raises his arms (no emote)
- Look away from gaze attack
- Lots of AOEs center on players, so mind your positioning
Trash mobs
In keeping with Final Fantasy XIV’s current design trends, The Drowned City of Skalla has relatively few trash groups—three or four between each boss—and a decently-geared tank should easily be able to grab a couple of groups at once. The regular mobs don’t really have any skills worth mentioning; just the usual marked AOEs that are easily avoided. The Stone Phoebads start casting an untelegraphed linear AOE in front of their hands as soon as they’re pulled, so it’s best to not be in their way, but getting by them is far from the end of the world.
Skalla doesn’t have any puzzles or anything to deal with, either. It’s just a straight run from one boss to the next, killing a few trash pulls along the way. Quick and painless.

Kelpie
The first boss of the Drowned City of Skalla is Kelpie, a horse-like water demon based on Celtic mythology. The fight takes place in a square arena, the outer edges of which are marked purple—standing in here gets you a stacking water vulnerability debuff, which isn’t ideal since all of Kelpie’s attacks are water based.
Throughout the fight, Kelpie uses the following attacks:
- Torpedo: A tankbuster. You can use cooldowns if you need or want to, but it doesn’t hit too hard so you can just heal through it.
- Rising Seas: A party-wide AOE that can’t be avoided and needs to be healed through. Healers should be mindful of any party members who have water vulnerability.
- Bloody Puddle: Two or three non-tank players get marked, and then Kelpie drops a big puddle on those players’ positions at the end of the cast, doing small damage. Anyone who stands in a puddle gets a Drowsy damage-over-time debuff that can’t be cleansed. Best to put these in the corners, so that they’re out of the way.
- After the puddles fall, each marked player gets tethered to a ball of water. These explode after a few seconds, or if they catch up to their tethered player, so try not to get too close to them.
- Hydro Pull: Kelpie jumps to one side of the arena, at the edge of the purple murk, and starts casting this. At the end of the cast, a tidal wave pushes all players towards the opposite side to Kelpie; if you’re not right up against Kelpie’s edge when the wave hits, you’ll get pushed into the murk on the other side and get debuffed. Think Tsunami (Leviathan/Shinryu), but failing the mechanic isn’t an instant death.
- Hydro Push: The same as Hydro Pull, except the tidal wave comes from the opposite wall to Kelpie and pushes you towards her.
Note: The names can be confusing; Hydro Pull pushes you away from Kelpie, and Hydro Push pulls you towards her. This is a translation error, and in all languages other than English, Hydro Push pushes and Hydro Pull pulls.

The Old One
The second boss of the Drowned City of Skalla appears to be based on Arahabaki, an ancient Shinto god. It’s a good idea to stay close to him, because that makes it easier to dodge a cone attack that he uses fairly often. This is a pretty straightforward fight, and The Old One as only a couple of moves:
- Mystic Light: A cone-shaped AOE centered on a random player, roughly 60 degrees wide. It’s easier to dodge at the narrow end of the cone, so stay close to The Old One.
- Mystic Flame: Circular AOEs on randomly targeted players. Just move out of the way.
- Order to Self-destruct: The boss becomes invincible and spawns 4-8 adds called Subservient, who walk around the room in a circle. Kill the adds before the cast is finished, otherwise he does an unavoidable party-wide AOE with big damage.
- Shifting Light: Used in conjunction with Order to Self-destruct when the bosses health starts to get low. Everyone turns into a spriggan, with just one ability, to drop a bomb that explodes after a couple of seconds. You can’t attack the Subservients directly in Spriggan form, so you have to see which direction they’re moving and drop bombs in their path.

Hrodric Poisontongue
The final boss of The Drowned City of Skalla is a huge demon with a lot of attacks at his disposal, many of which aren’t telegraphed, so everyone needs to pay attention. He has a lot of different AOEs and things can get pretty hectic, but he doesn’t hit too hard so there’s room for error. This isn’t a tough fight, it just demands a bit of awareness.
- Rusting Claw: A wide conal attack in front of the boss. There’s no AOE marker, but this is indicated by an emote that says “Hrodric Poisontongue raises his claw. Applies a vulnerability debuff if you get hit. Move behind the boss when you see the emote.
- Tail Drive: The same as Rusting Claw, but this time it’s a cone attack behind the boss, indicated by “Hrodric Poisontongue readies his tail.” Move in front of the boss to avoid it.
- Words of Woe: A linear AOE centered on a random player. There’s no AOE marker or emote, you just have to watch the boss’s animation; when the boss turns around and raises his arms, he’s starting to cast this. As long as you’re not in a direct line from his face, you’ll befine.
- The Spin: An unavoidable proximity AOE. Get as far away from the boss as you can.
- Eye of the Fire: A room-wide gaze attack that confuses any player it hits. Face away from the boss to avoid it.
- Cross of Chaos: A cross-shaped AOE similar to Lakshmi’s Hand of Grace attack. One player gets marked, and the AOE marker moves with them, so they need to position it away from the group as much as possible.
- Ring of Chaos: A donut-shaped AOE around a marked player—that is, there’s a safe circle immediately around the player, and then an unsafe donut around that. Like Grand Cross, the AOE moves with the player.
- Circle of Chaos: Another player-targeted AOE, a standard circular attack indicated by a black marker around the player(s).
When his health gets low, Hrodric Poisontongue likes to use those last three moves (Grand Cross, donut, and black circle) all at once, so players need to be aware of where everyone else is to avoid overlapping AOEs. There’s a lot going on in the fight and a lot to watch out for, but it shouldn’t be too troublesome.
Loot
The Drowned City of Skalla is home to an item level 315 gear set for each role, which is better than any Tomestone of Verity gear but slightly weaker than the rewards from Omega (i320). Like other Stormblood green-rarity gear, though, Skalla pieces can be converted to materia once spiritbound, making them worth collecting even if you already have better equipment.
The final boss chest also has a low chance of dropping an adorable seal minion, called Salt & Pepper Seal, and an orchestrion roll.
Update 19/10/2017: Confirmed the names of some of Poisontongue’s moves, which previously had placeholder names.